How to Attach Drive Files to Emails
Step-by-step guide to attaching Google Drive files to your mail merge campaigns. Learn how to send different files to different recipients and manage attachments in MassyMail.
4 min read
Updated 3/15/2026
- Set Up the Attachments Column
- Open the Google Drive File Picker
- Select Files to Attach
- Map Files to Recipients
- Confirm and Send with Attachments
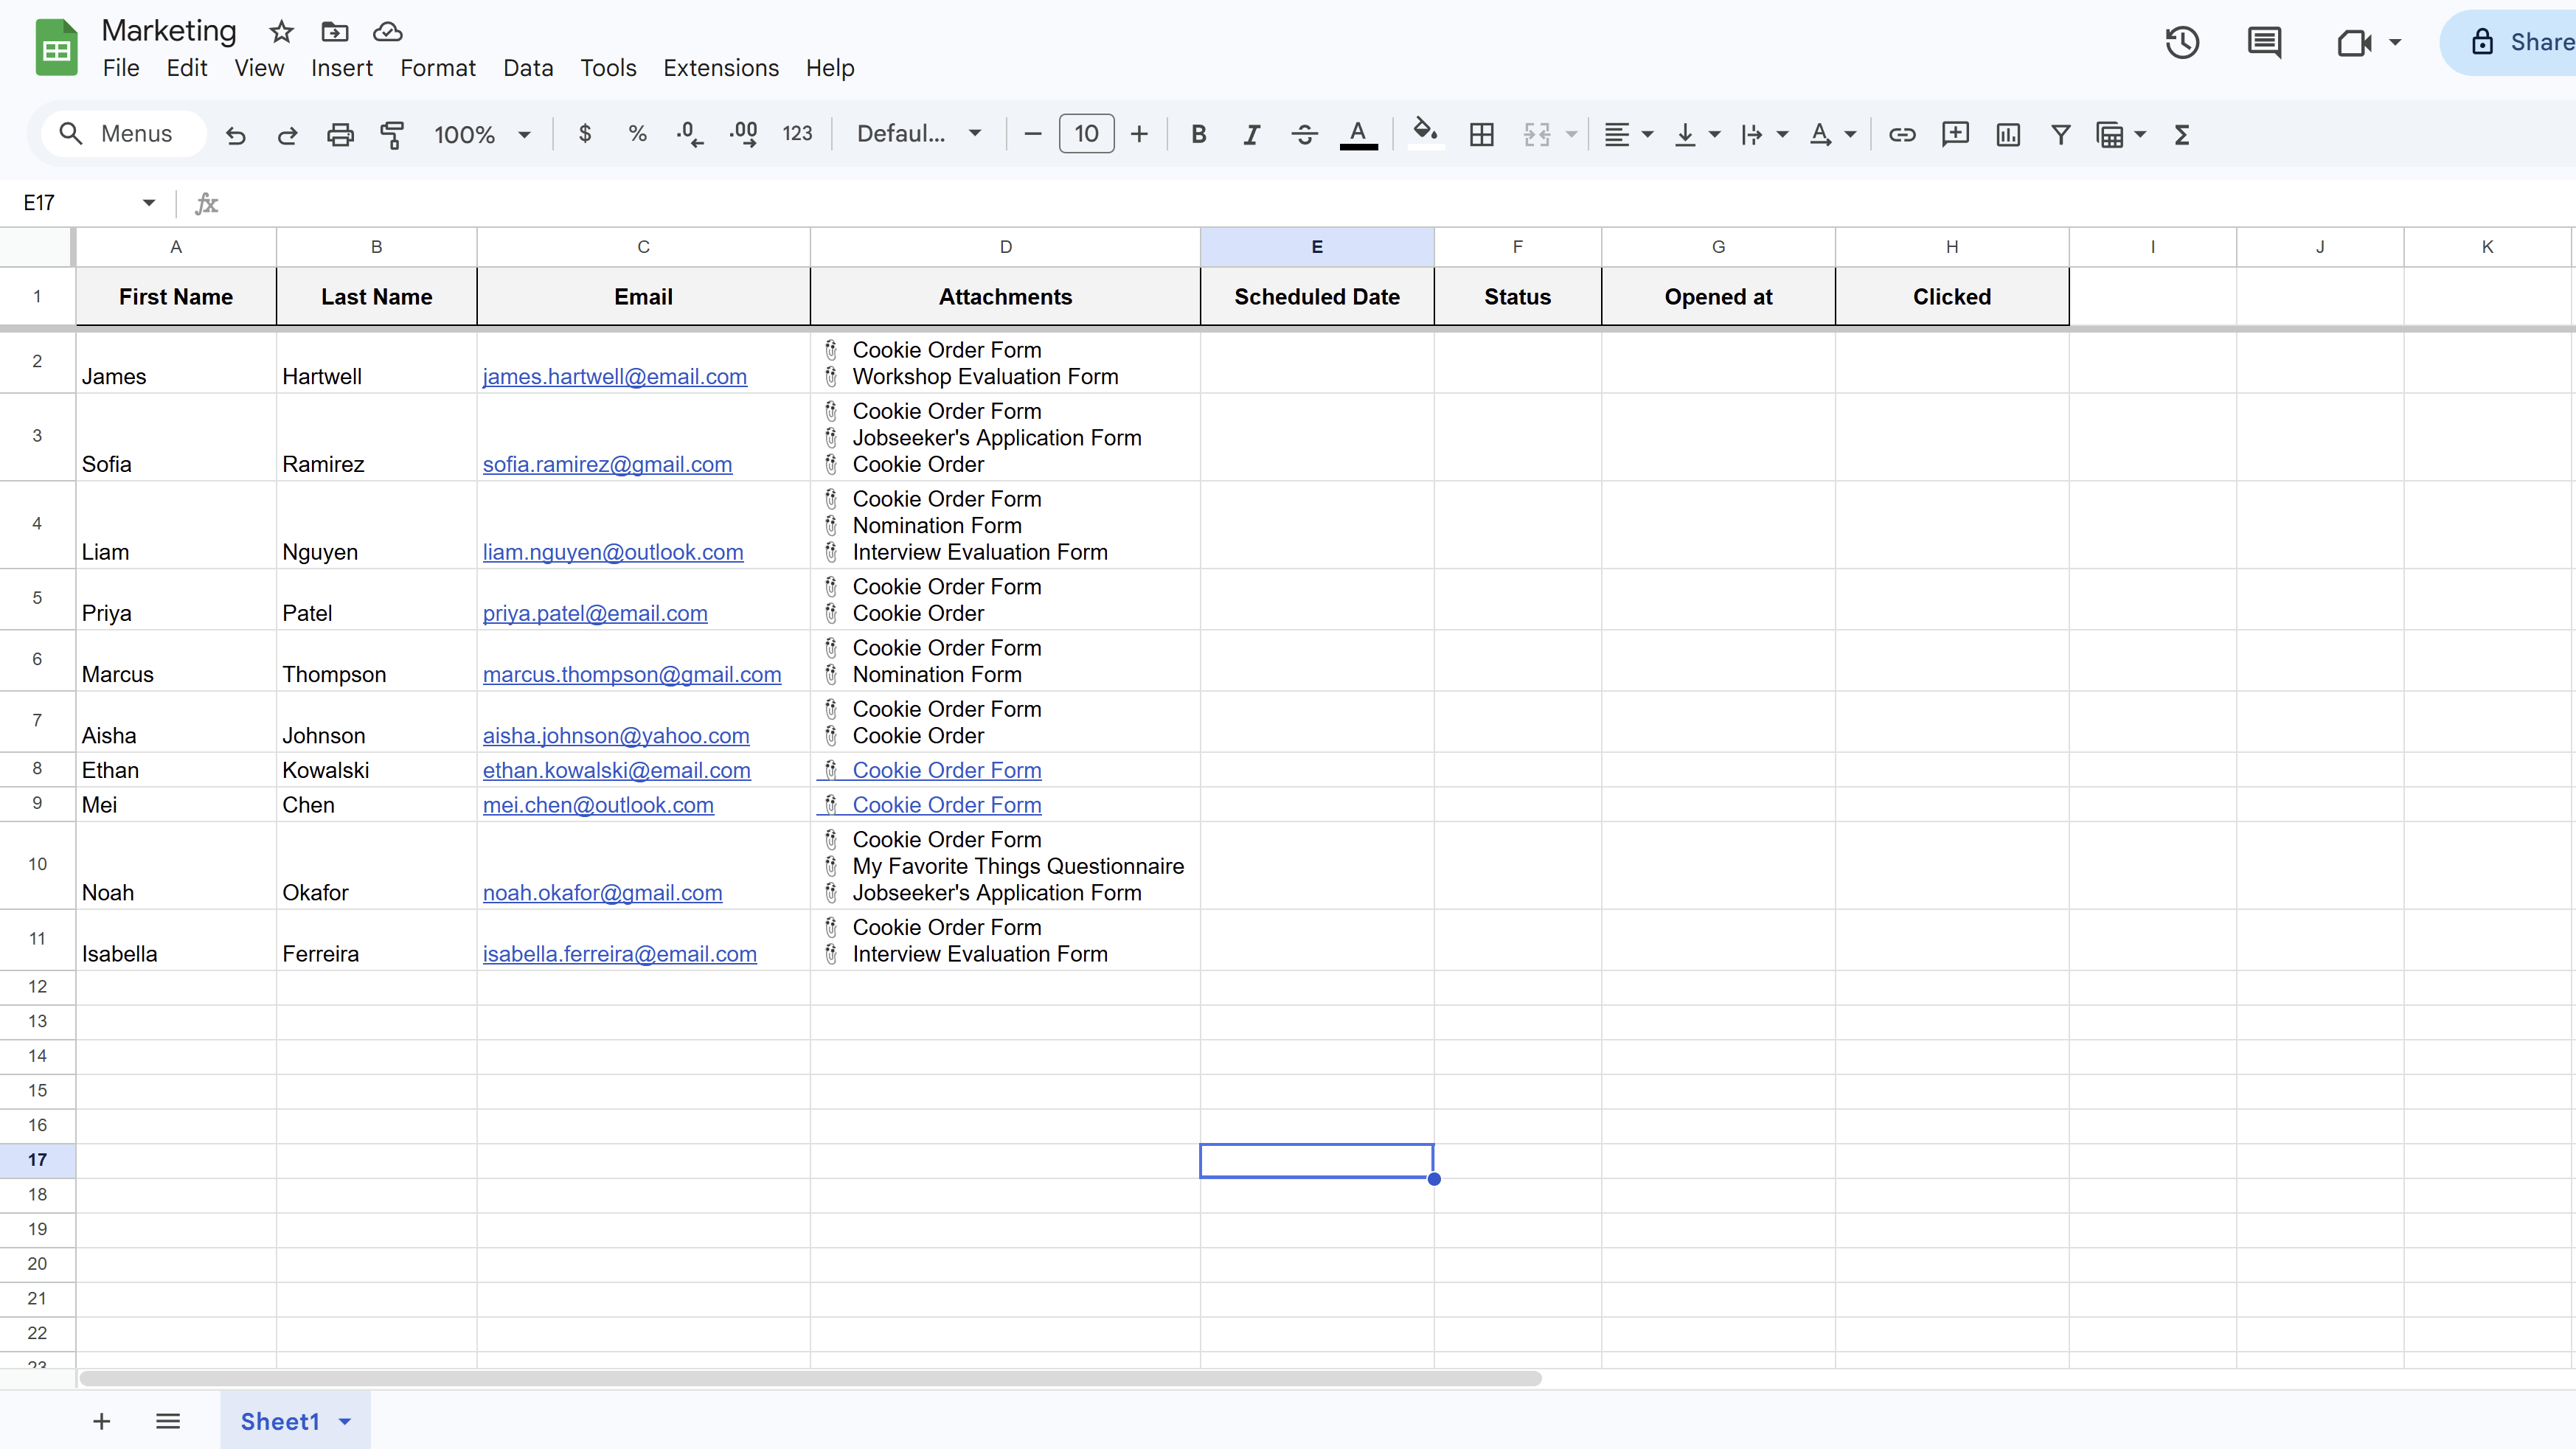
Set Up the Attachments Column
MassyMail supports sending Google Drive files as email attachments — and you can even send different files to different recipients within the same campaign. Before using attachments, your Google Sheet needs an Attachments column. If you let MassyMail initialize your sheet, this column is added automatically. If you set up your sheet manually, add a column named exactly Attachments.
MassyMail reads file metadata from this column at send time and attaches the corresponding Drive files to each recipient's email. The column values are populated through the file picker — you don't need to enter file IDs manually.
Open the Google Drive File Picker
In the MassyMail campaign workspace, locate the Attachments section in the campaign configuration panel. Click the Attach Files or file picker button. This will open a Google Drive picker dialog — the same familiar file browser used across Google Workspace.
Grant the necessary Drive access permissions if prompted. MassyMail requests read-only access to your Drive files — it reads the file content to attach it but never modifies your Drive files.
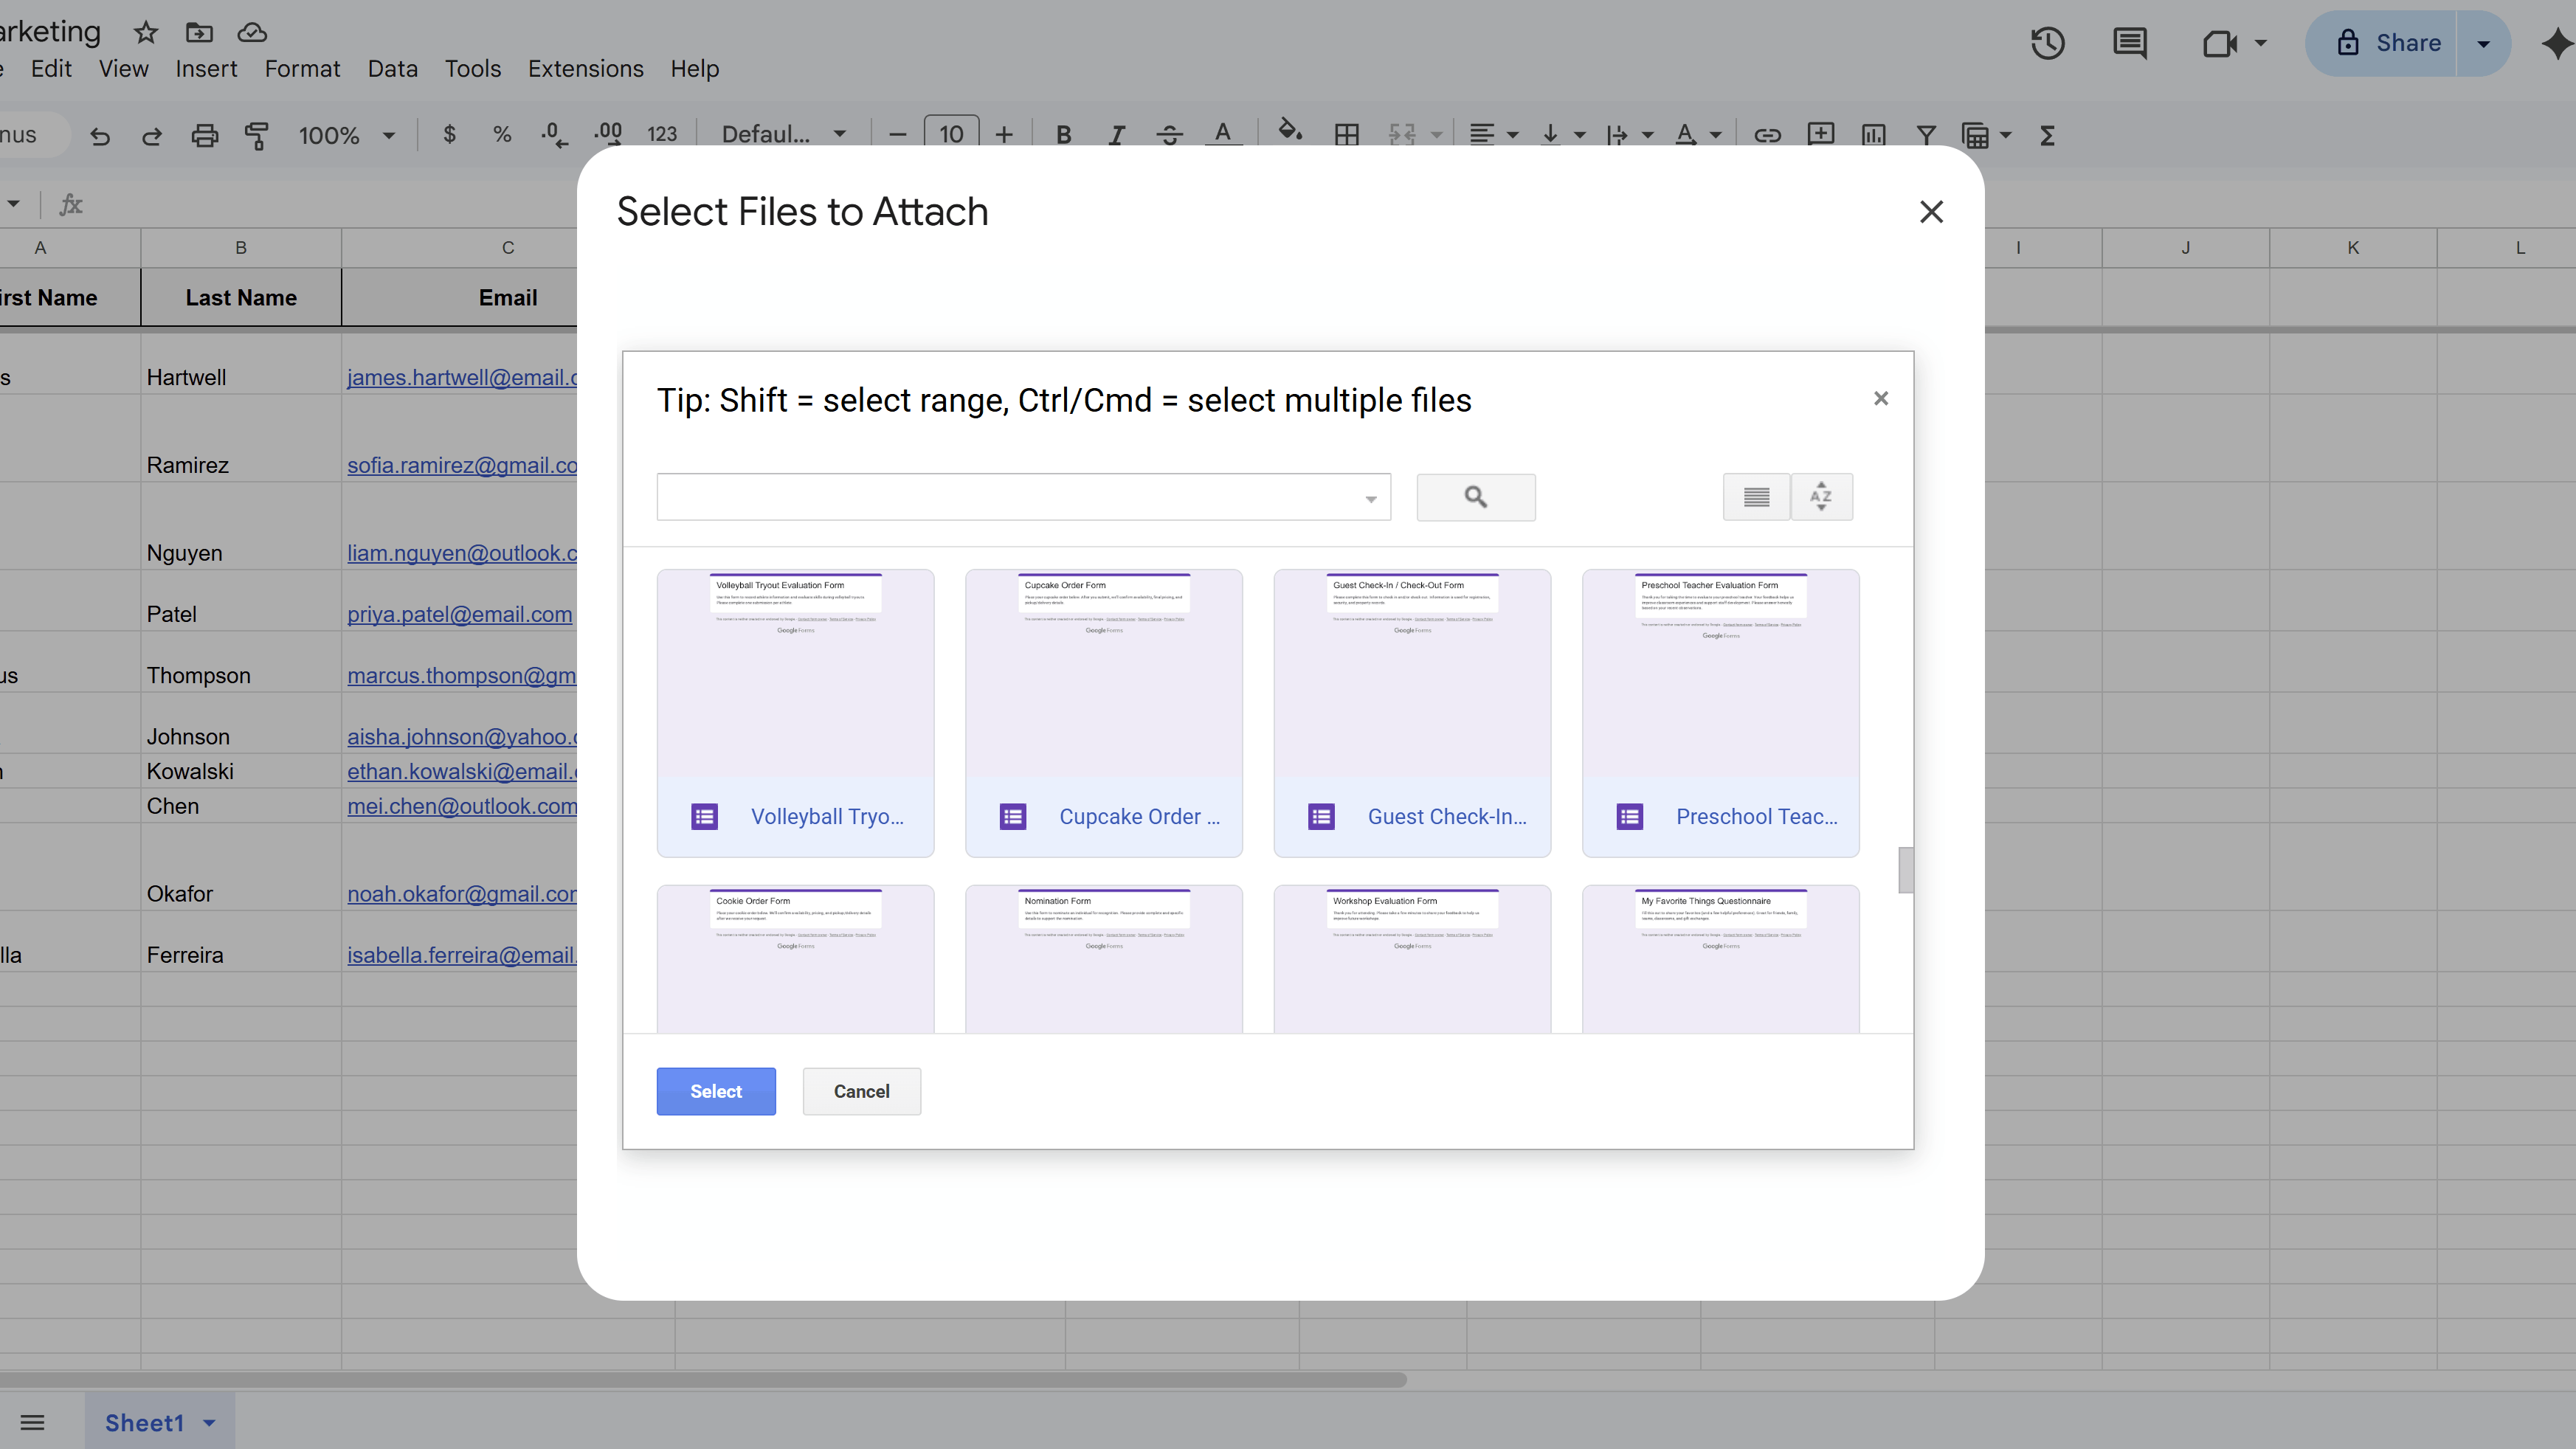
Select Files to Attach
In the Drive picker, browse or search for the files you want to attach. The picker supports multi-file selection — you can hold Shift to select a range of files, or hold Ctrl (Windows) / Cmd (Mac) to select individual files. Click Select when you're done.
You can attach any file type stored in Google Drive — PDFs, images, spreadsheets, Word documents, ZIP files, etc. Note that some recipients' email clients may have trouble opening certain file types, so prefer widely compatible formats (like PDF) when possible.
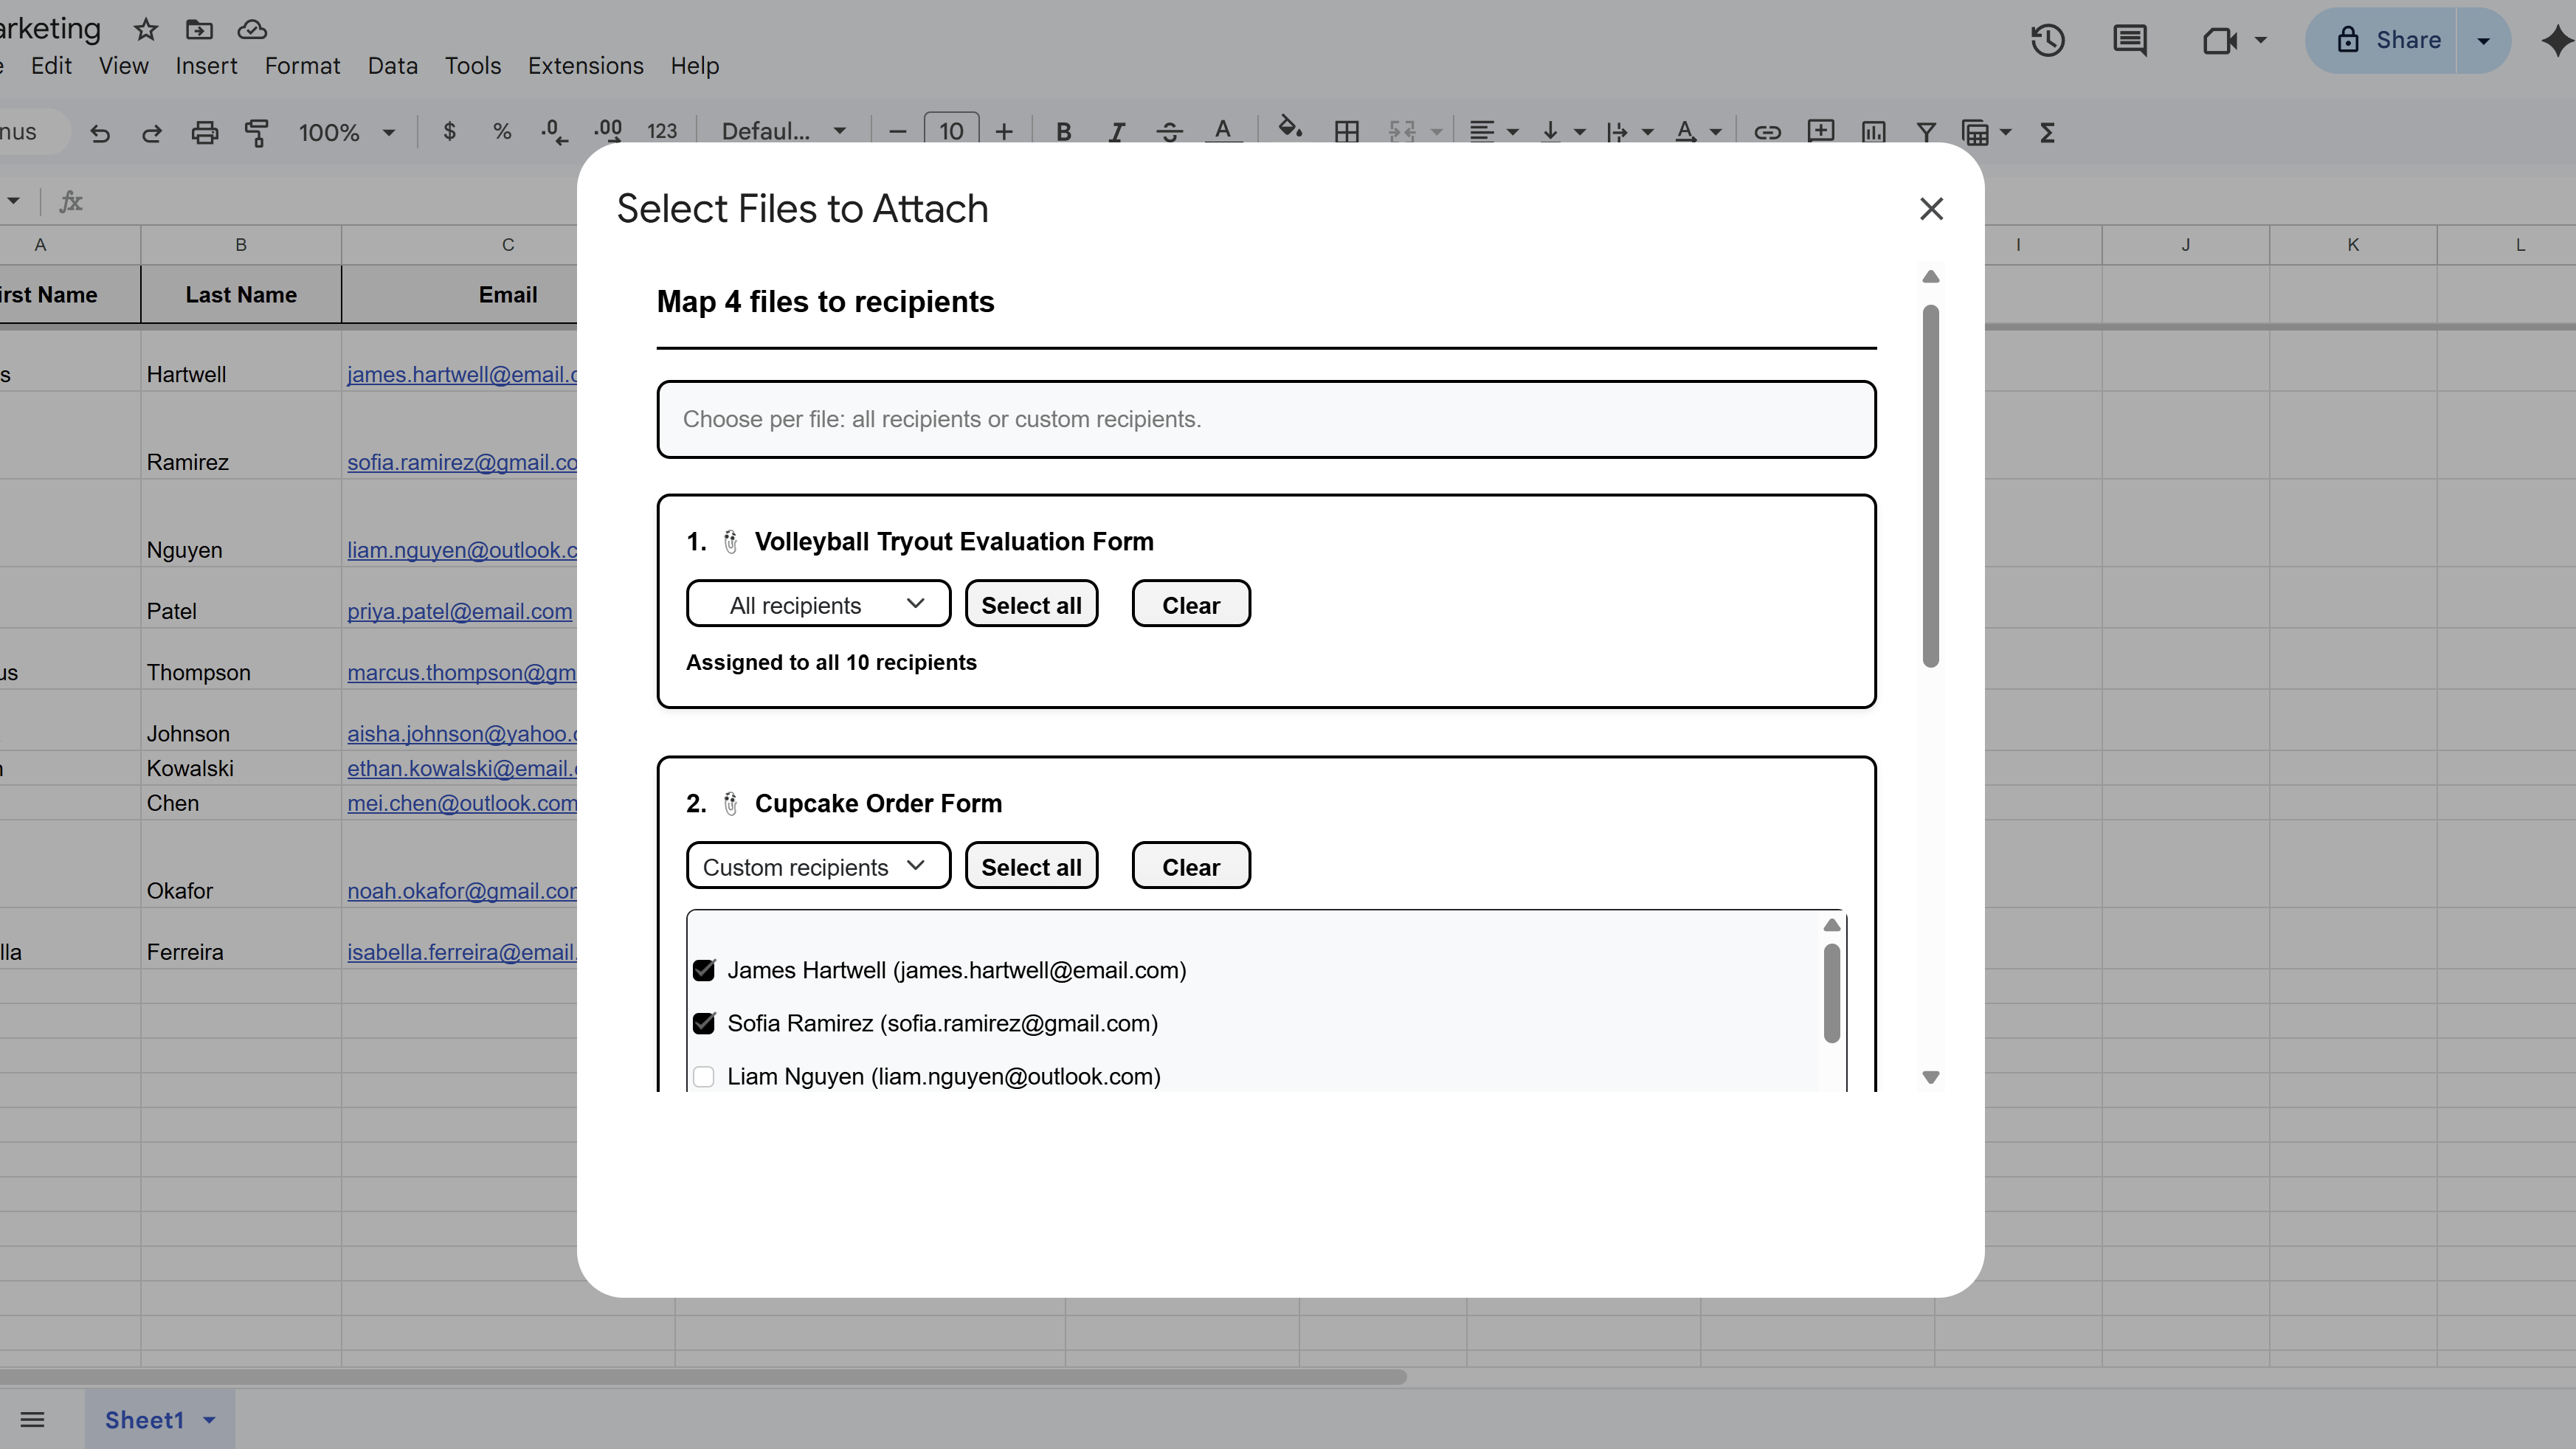
Map Files to Recipients
After selecting your files, MassyMail will show a mapping interface where you assign each file to the recipients who should receive it:
- All recipients — attach the file to every email in the campaign. Use this for things like a company brochure, price list, or general event guide.
- Specific recipients — attach the file only to a subset. Select individual rows or use the quick-select options. This is useful for sending personalized documents like invoices, proposals, or certificates.
Each file is mapped independently — you can have File A go to everyone, File B go to a specific group, and File C go to just one person, all in the same campaign.
Once mapping is complete, MassyMail writes the file metadata into the Attachments column of the relevant rows in your sheet.
Confirm and Send with Attachments
With attachments mapped, proceed with your campaign as normal. Click Send Test Email to send yourself a test copy — verify that the correct files are attached and that they open without errors.
Once you're satisfied, click Send Campaign. MassyMail will read the attachment metadata from each row's Attachments column at send time and include the appropriate Drive files as email attachments for each recipient.
Keep in mind that large attachments increase the time it takes to send each email. For very large files or many attachments, consider sharing a Drive link in the email body instead of attaching directly.
Tips and Best Practices
- Use PDFs for attachments wherever possible — they're universally compatible, maintain formatting, and are less likely to trigger spam filters than editable file types.
- For contracts or invoices, generate individual personalized PDFs per recipient and place each in a Drive folder — then map each file to its intended recipient.
- If file size is a concern, share a Drive link in the email body instead of attaching — a link to a Drive file is faster to send and doesn't increase the email's total size.
Common Pitfalls to Avoid
- Don't move or delete files from Google Drive after mapping them — MassyMail retrieves attachments at send time, so files must still exist and be accessible when the campaign runs.
- Very large attachments may cause some emails to fail due to Gmail's attachment size limit (25MB per email). Keep individual file sizes reasonable.
For a complete walkthrough of Gmail mail merge — including templates, scheduling, and tracking — see our Gmail Mail Merge: The Complete Guide. New to MassyMail? Install it free from the Google Workspace Marketplace.
Try Free
MassyMail: Mail Merge for Gmail
Send personalized bulk email campaigns directly from Gmail using your Google Sheets data. Schedule campaigns, track opens and clicks, and manage templates without leaving Google Workspace.
- Send up to 1,500 emails/day
- Merge fields & personalization
- Scheduled email campaigns
- Email open & click tracking
- Reusable email templates
- Built right into Google Sheets