How to Create Columns in Google Docs
Learn how to make two columns in Google Docs, or make more.
3 min read
Updated 9/16/2025
Introduction
Google Docs makes it easy to create columns for organizing content in a professional layout. Columns are useful for newsletters, brochures, or academic formatting. You can apply them to an entire document or just to a selected portion of text.
Steps to Make Columns
Follow these steps to insert columns in your Google Docs (desktop/web version):
- Open the Google Docs document you want to work on.
- If you want columns only in part of the document, highlight the text. If you don’t select anything, the column layout applies to the whole document.
- Go to the top menu and click Format.
- Hover over or click Columns.
- Select one of the layouts (one, two, or three columns).

Column Options
For more control over the layout, click More options under the Columns menu. This lets you adjust:
- Number of columns
- Spacing between columns
- Whether to show a line between columns
After making your adjustments, click Apply. The document (or selected text) will reflow into the columns.

Additional Features & Tips
Here are some extra tools to work with columns effectively:
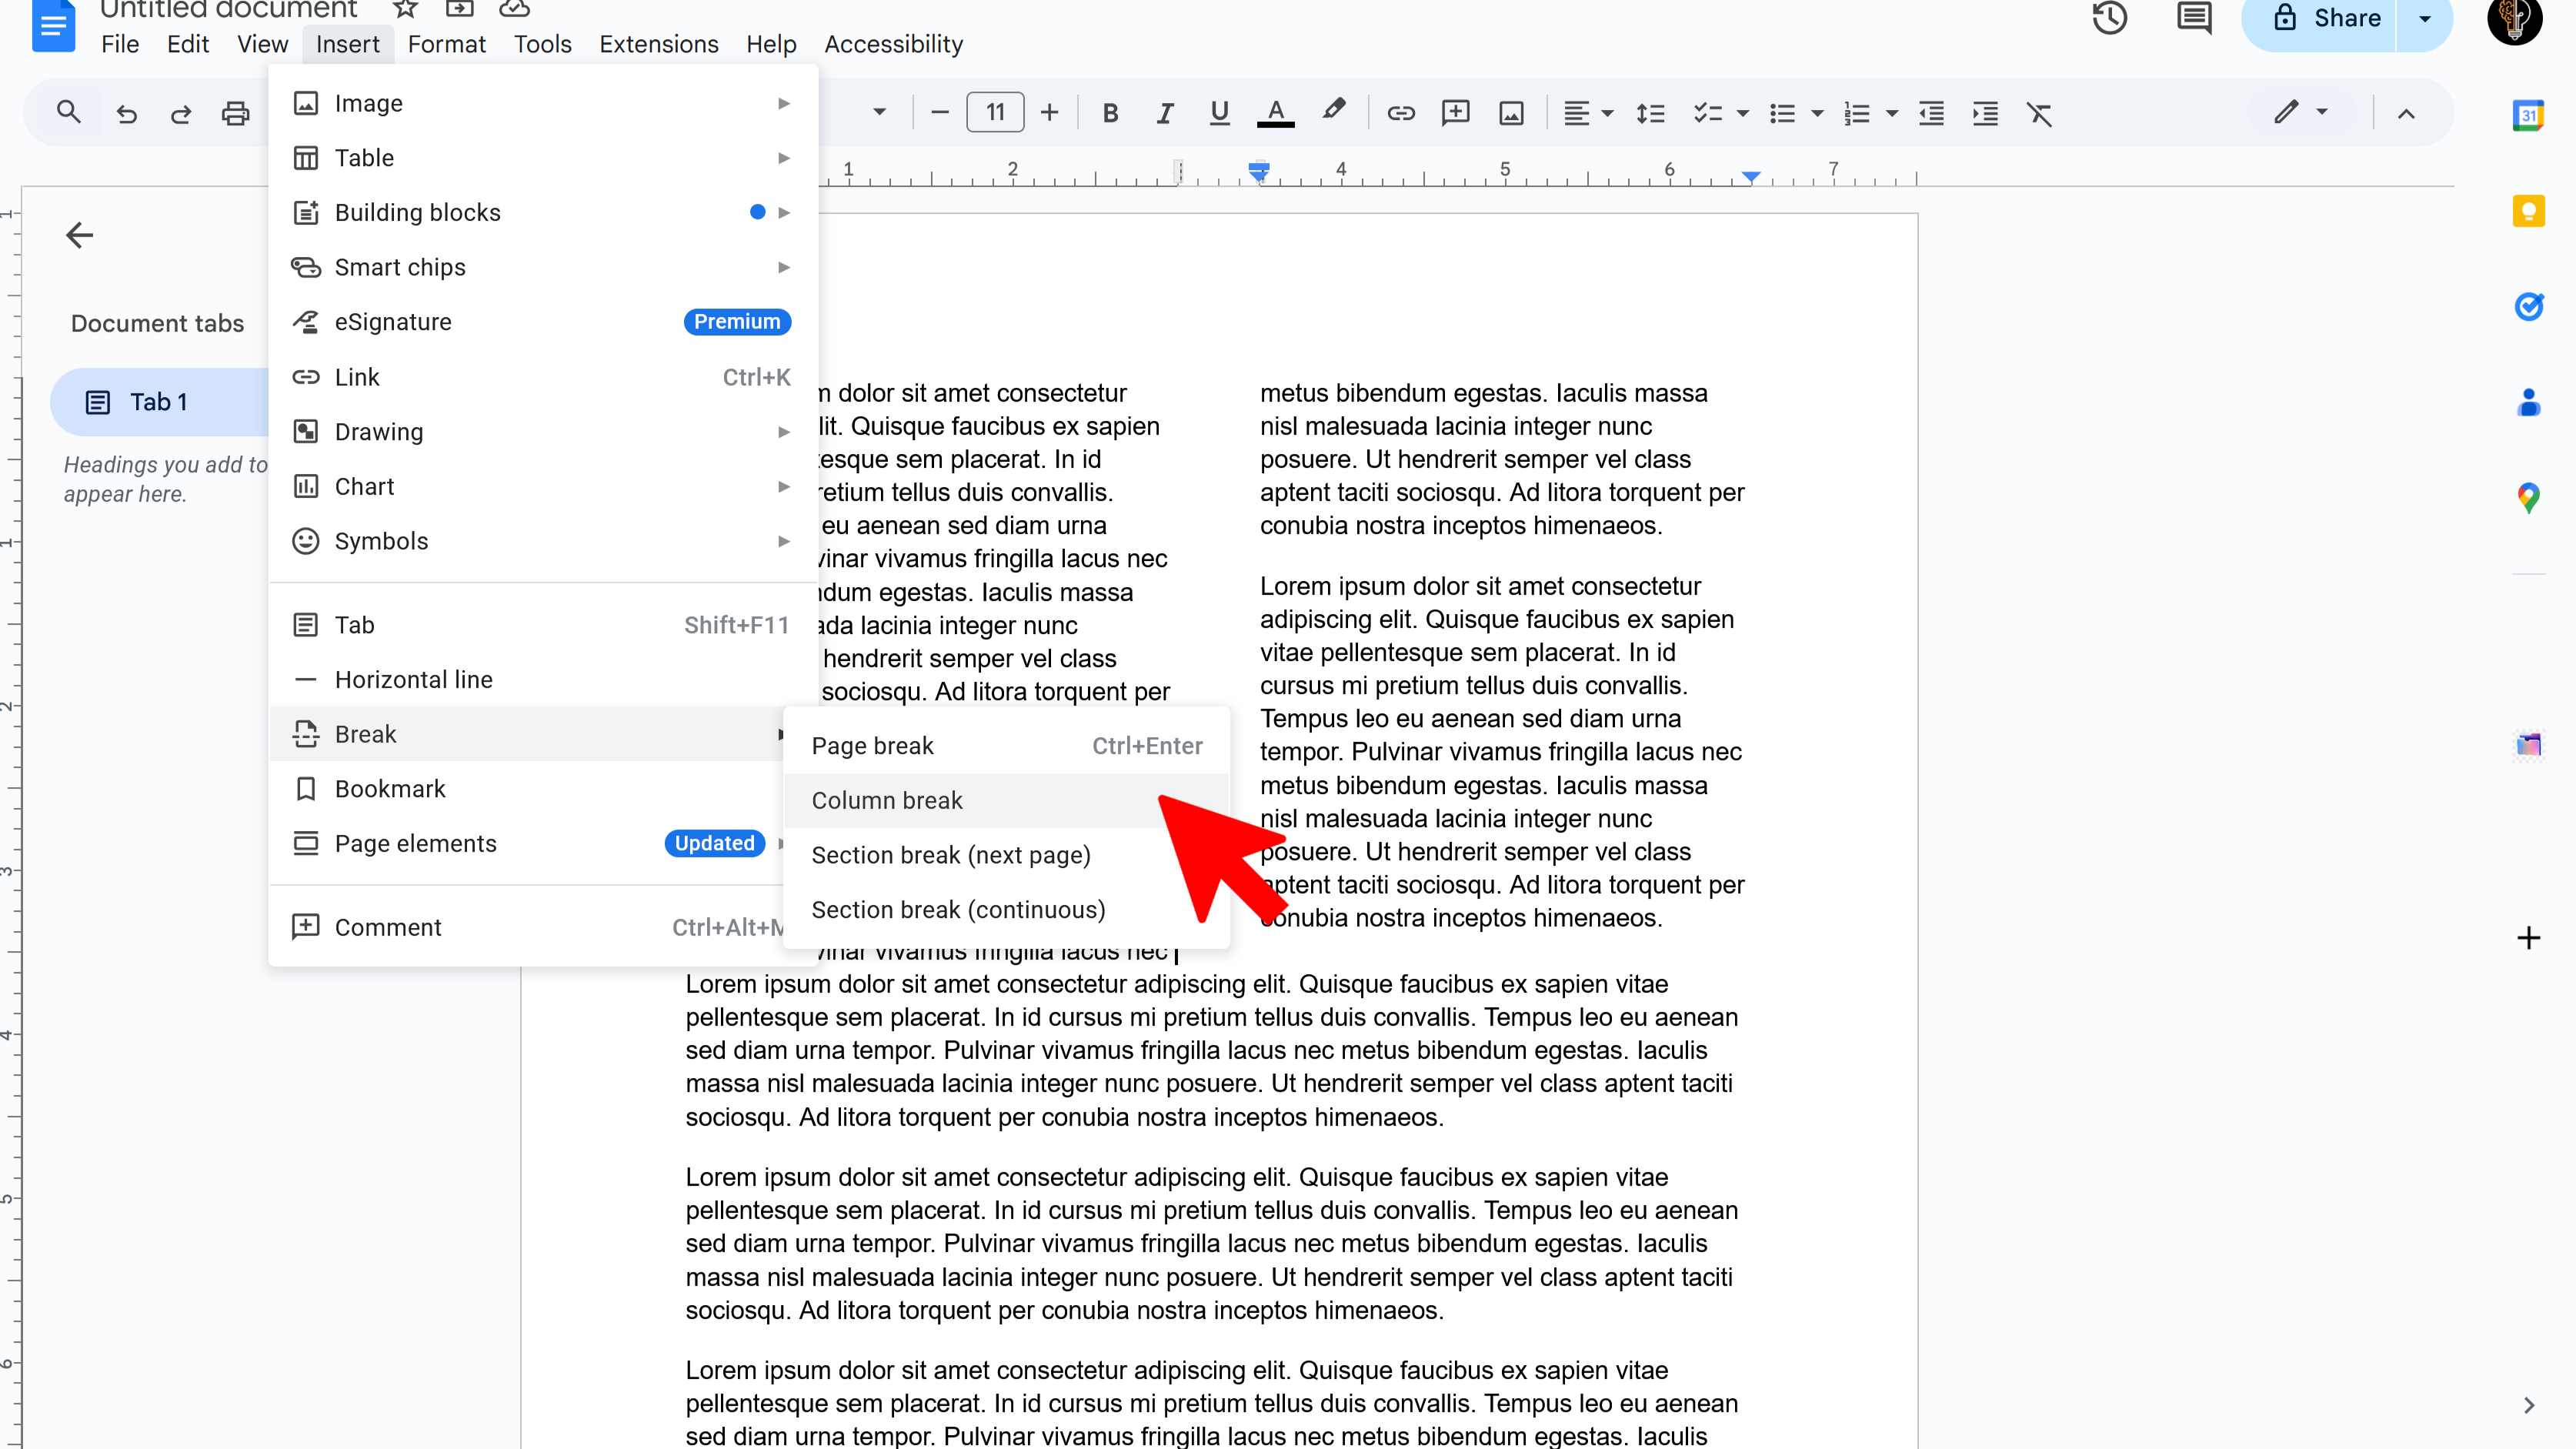
- Column break: To force text into the next column, go to Insert → Break → Column break.
- Changing columns: To adjust the number of columns, repeat the Format → Columns step and select a new layout.
- Removing columns: To return to a single-column layout, set it back to one column.
Try Free
DocReader: Text to Speech & Translate
Convert text to speech and translate docs seamlessly. Perfect for accessibility and multilingual content.
- Text to speech conversion
- Downloadable audio files
- Customizable voice options
- Easy-to-use interface
- Enhances accessibility
- Built right into Google Docs